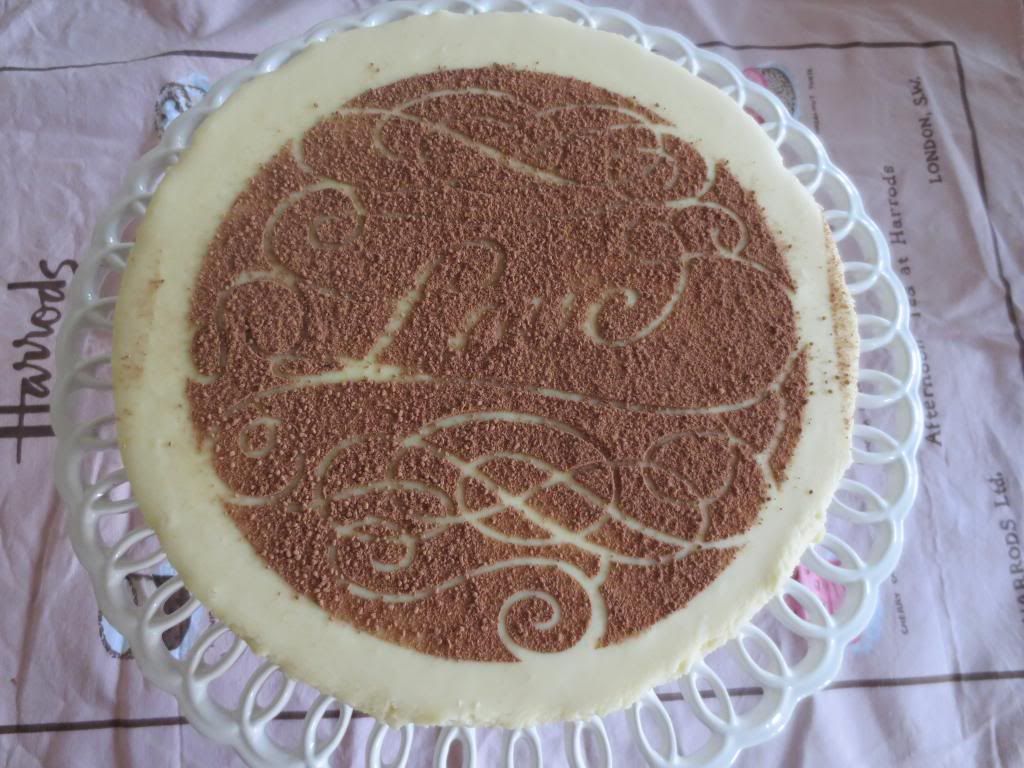
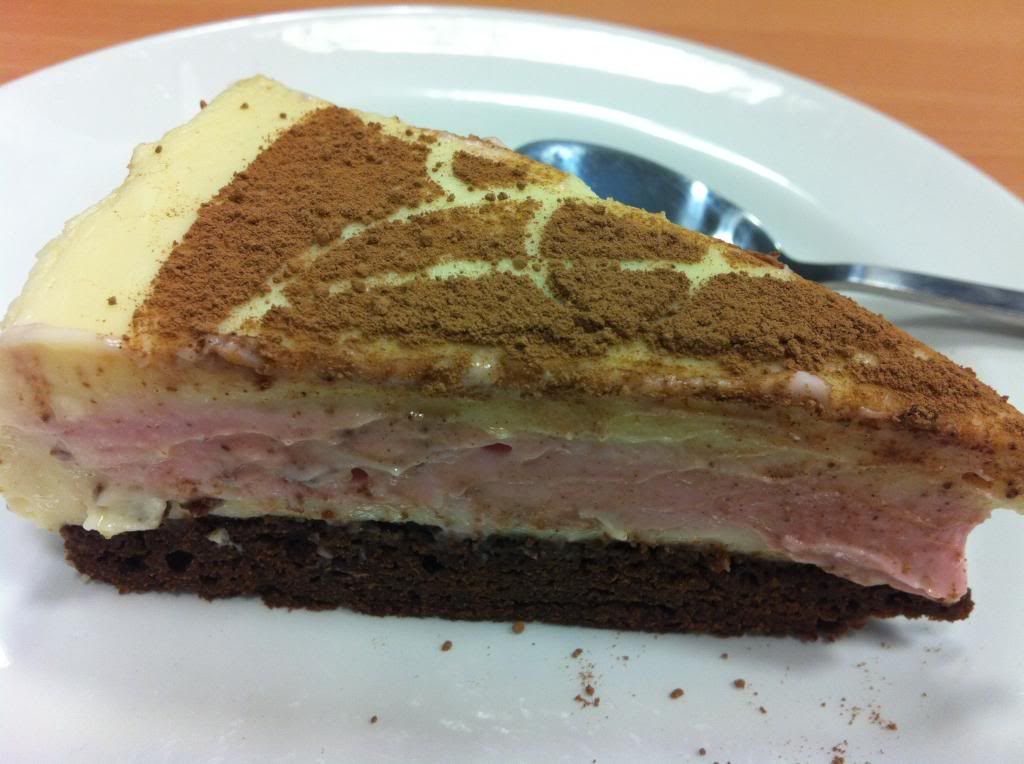
Happy Valentines Day!! For Valentines Day, I have made a glorious Double Choc Fudge Cheesecake by Michelle Southan from the February 2013 edition of Australian Good Taste magazine. Isn't it gorgeous? It is a chocolate brownie base, topped with white chocolate cheesecake, then raspberry cheesecake, then another layer of white chocolate cheesecake. Finally, it is stencilled with cocoa using the free stencil that came with the magazine. Bliss! And it tasted as good as it looks.
Here is a side view of the four layers:
Tempted? To make this cheesecake, you will need:
Base
60ml hot water
50g chopped dark chocolate
40g butter
2 tsp self-raising flour
2 tbs cocoa powder
1 lightly whisked egg
Preheat your oven to 160 degrees Celsius. Grease and line the base and sides of an 18cm springform pan as smoothly as possible with baking paper, so that the paper rises 2cm above the rim of the pan.
Heat the water, chocolate and butter in a microwave on high, stirring once every minute, until the chocolate melts and the mixture is smooth. (yes, this sounds like madness, but trust me, it works.) Add the sugar, flours, cocoa powder and egg and mix well. Pour into the prepared springform pan and bake for 30 minutes or until cooked through. Remove from the oven and allow to cool completely.
White chocolate cheesecake
500g cream cheese, at room temperature
100g sugar
125ml thickened cream
200g melted white chocolate
2 tsp vanilla
80ml boiling water
2 tsp gelatine
Raspberry cheesecake
100g thawed frozen raspberries
250g cream cheese, at room temperature
55g sugar
60ml thickened cream
2 tbs boiling water
1 tsp gelatine
To make the first layer of white chocolate cheesecake, beat together half the cream cheese and half the sugar until smooth. Beat in half each of the cream, melted chocolate and vanilla. Put half the water in a heatproof bowl and sprinkle over half the gelatine. Stir until the gelatine is dissolved, and allow to cool for 1 minute before beating into the cream cheese mixture. Pour the cheesecake mixture over the cooled brownie base, cover the top of the tin with cling film, and place the tin in the fridge for 1 hour to allow the cheesecake to set.
To make the raspberry layer, mash the raspberries in a bowl with a fork, then press the berries through a sieve and discard the seeds. Beat the cream cheese and sugar together until smooth, then beat in the raspberry puree and cream. Put the boiling water in a heatproof bowl and sprinkle over the gelatine, then stir until the gelatine has dissolved. Allow the gelatine mixture to cool for 1 minute, then beat into the cream cheese mixture. Pour the raspberry cheesecake over the white chocolate cheesecake layer, cover the top of the tin with cling film, and refrigerate for one hour to allow the layer to set.
Make the final white chocolate layer in the same way as the first, using the remaining white cheesecake ingredients. Pour the white chocolate cheesecake over the raspberry layer, cover the top of the tin with clingfilm, and refrigerate for 4-6 hours until set. (I refrigerated it overnight and the and the cheesecake was well set by morning.)
To serve, you can optionally place a pretty stencil lightly against the top of the cheesecake, and then dust over the top of it thoroughly with cocoa powder in a sieve. Remove the stencil carefully so as to preserve the pattern, then take the cheesecake to the table to wow your guests with its beauty. (I missed the latter part, as I was taking mine to work.) Cut into slices with a warm knife to serve:
This cheesecake is sweet, smooth and silky, and very dangerous to have in the house. By taking it to work, I could indulge in one decent sized slice, knowing that there would not be another, and enjoy it I did.
What are you doing for your beloved this Valentines Day, if you celebrate it?
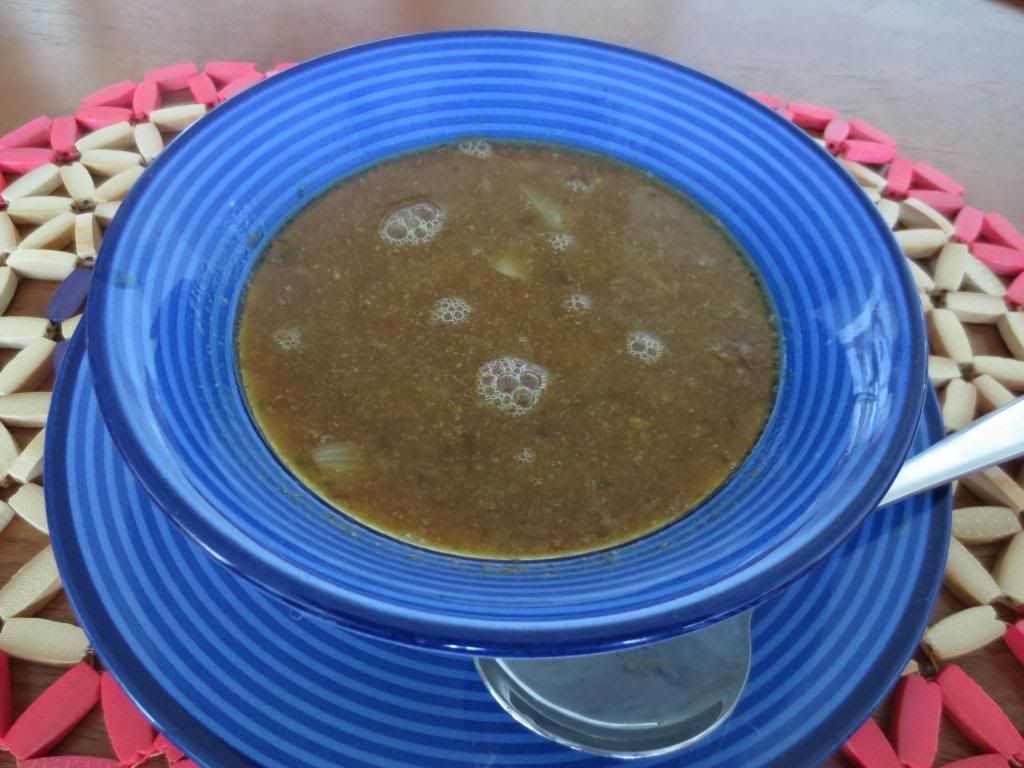
This week's Wednesday with Donna Hay is hosted by Kayte, who chose Donna's French Onion Soup from Modern Classics I.
Now, y'all will know that I am not much of a soup fan, and I was kind of hesitant wth this one. I made a quarter of a recipe on Sunday night, enough just for two serves, and put it in the fridge for another day, as I was already really full from late brunch with friends.
On Monday night, I reluctantly trotted out half a serve and reheated it for a minute or so in the microwave. Then I had a spoonful - and then another - and by golly, I really liked this soup. Who knew - and especially onion soup??
To see what Kayte, Margaret and Chaya thought of this dish, visit their websites. And if you want to join us on our Donna journey, just contact any of us - we are cooking from Off the Shelf and Modern Classics I by Donna Hay.
Last week was Rosario's birthday, and of course I had to bake her a cake. The very sad part was that Rosario took the last working day before here birthday off work, so she was not there to enjoy her own cake. But what can you do - the cake had a sponge-like texture and would have been no good by the next Monday.
For Rosario, I chose to bake Devil's Food Cake from p133 of Vintage Cakes by Jane Brocket. It is a beautiful book that I found through a recent visit to a bookstore, and I highly recommend it.
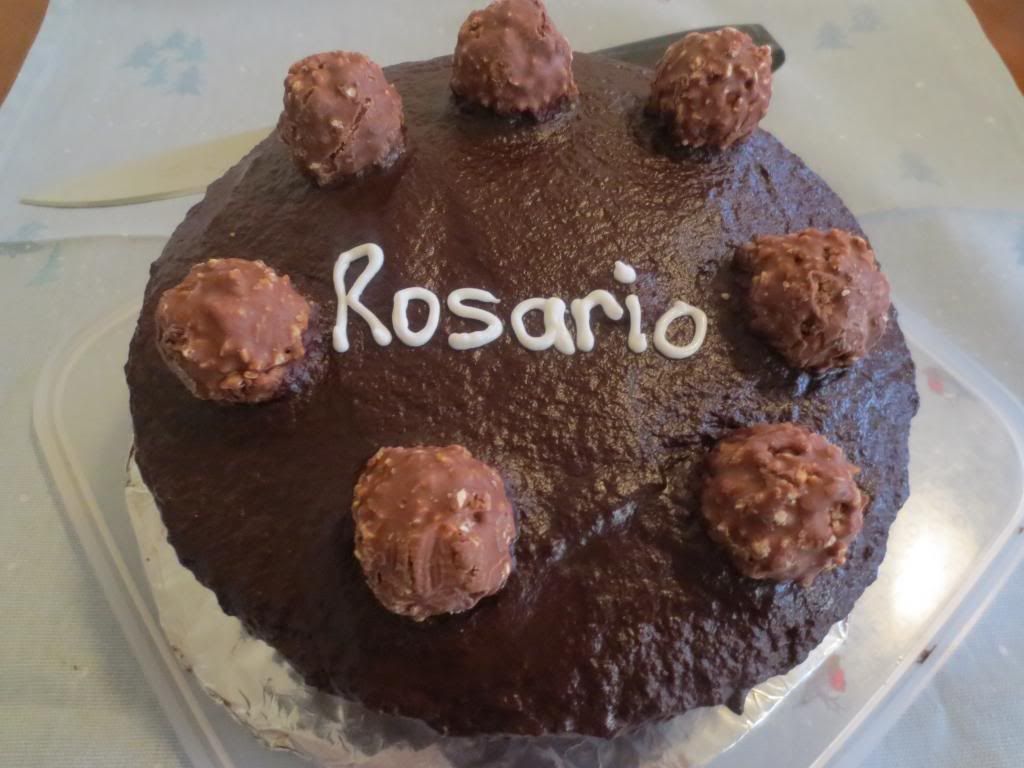
The cake consists of two layers of light chocolate sponge, coated in devilish fudgy chocolate icing. I chose to decorate my cake with Ferrero Rocher:
The frosting is made before the cake so that it can thicken up sufficiently before being layered onto the cake. To make the frosting, you will need:
1/2 cup milk
2 tablespoons brown sugar
120g butter
315g chopped dark chocolate
Place the milk, butter and sugar into a saucepan and stir over a gently heat until the butter has melted and the sugar has dissolved. Take the pan off the heat and add the chocolate, swirling the pan until the chocolate melts, then whisk it until smooth. Allow the frosting to cool for about an hour before using it.
To make the cake, you will need:
120g butter
1 1/4 cups sugar
2 eggs
1 2/3 cups plain flour
1/2 teaspoon baking powder
1 teaspoon baking soda
1/2 cup cocoa powder
1/2 cup cooled black coffee mixed with 1/2 cup milk
Grease and line 2 x 8" cake tins, and preheat your oven to 180 degrees Celsius..
In a large stand mixer, beat together the sugar and butter until smooth and creamy. Add the eggs, beating in one at a time.
Sift the dry ingredients together into a bowl. Fold in half the dry ingredients into the butter mixture, followed by half the coffee-milk mixture. Repeat with the remaining dry ingredients and liquid ingredients.
Divide the cake batter equally between the two cake tins, and bake for 25 minutes or until cooked through when tested. Allow the cakes to cool in the tins for five minutes before unmoulding onto a wore rack to cool completely.
To frost the cake, place one layer upside down (so that the flat bottom is upwards) onto a cake plate, and spread one third of the frosting over that layer. Place the other cake layer on top of it, flat side down, then spread the remaining frosting over the top and sides of the cakes. Decorate as desired, then serve and enjoy:
Series three of Downton Abbey started here tonight - I was so excited. It was great to finally see Matthew and Lady Mary walk down the aisle. I wasn't so sure about Lady Mary's dress though - I thought it was a little too dowdy.
Hope you had a great weekend.
Thank goodness it's Friday again - my week has been out of control, and the number of rabbits being pulled out of the hat lately is ridiculous. I look forward to the weekends, when I have some control over my own destiny.
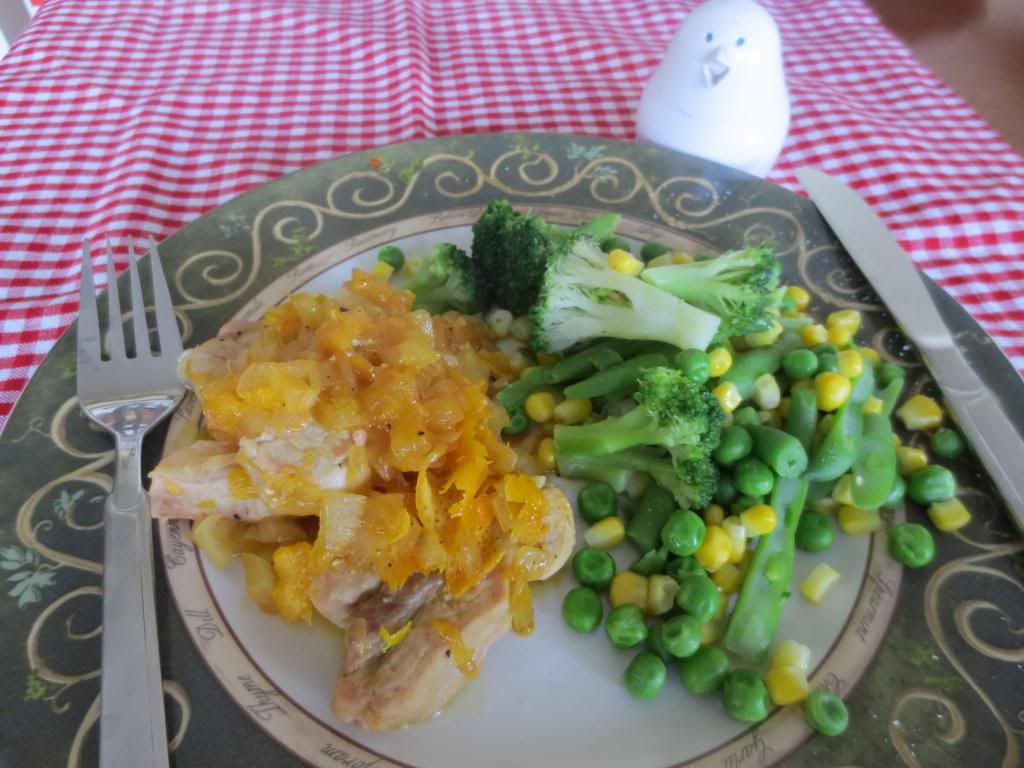
This week's French Fridays with Dorie recipe is Fresh Orange Pork Tenderloin. I can hear the people who hate meat and fruit together moaning in disbelief, but this was actually a rather delicious dish, with strips of pork tenderloin served in an onion and orange juice sauce, with orange segments. It is fairly quick and easy to make, with segmenting the oranges being the most taxing part of the exercise.
Dorie says this dish can't be reheated successfully, but I did the next day and it tasted just fine.
I served this dish with steamed veges, and found it to be a rather nice, light meal.
To see what the other Dorie cooks thought, visit the LYL section of the FFwD website.
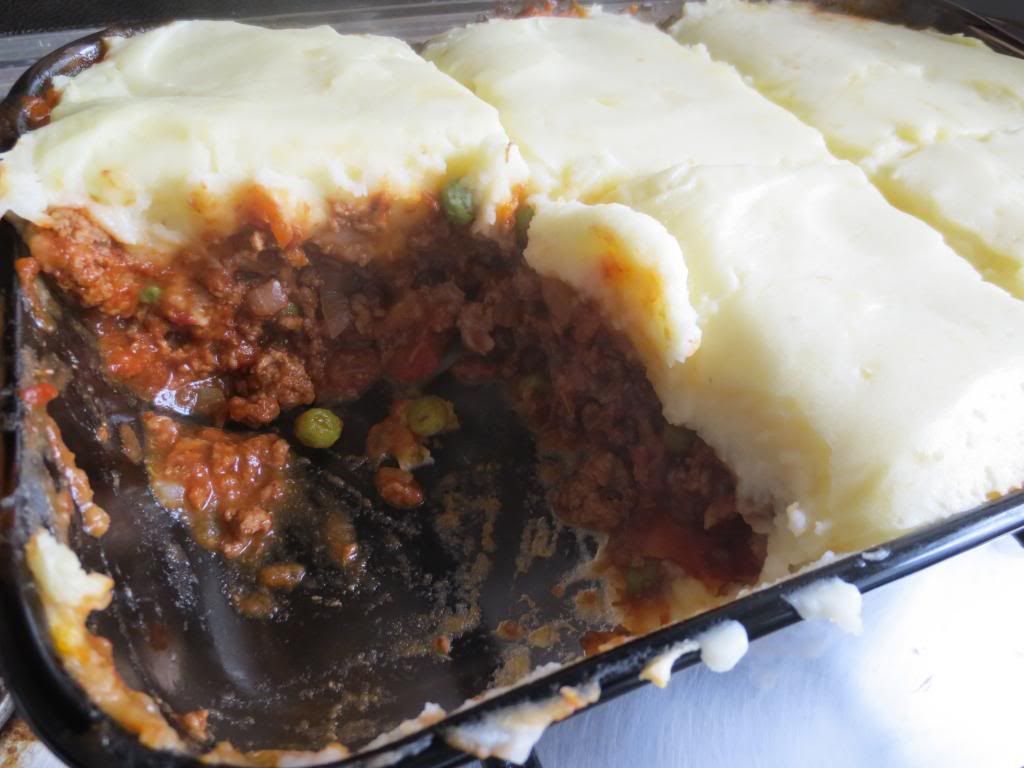
It's Wednesday again, and this week's Wednesday with Donna Hay recipe was Shepherds Pie, chosen by yours truly. A number of people have preceded us, so you can for instance find the recipe online here.
I liked the rich, red meaty sauce topped with cheesy potato. I also liked that this is a complete meal in itself, as it contains peas, carrots and onion.
My Mum doesn't put herbs in her Shepherds Pie, so I found the thyme and bay flavours a little odd, although not unpleasant. Just like Mum, I added a dash of hot suace (Worcestershire sauce) to the mince for extra flavour.
This dish is a keeper.
To see what Kayte, Margaret and Chaya thought, visit their sites.
This week's Baking with Julia challenge is Foccacia, and our host is Sharmini of Wandering Through.
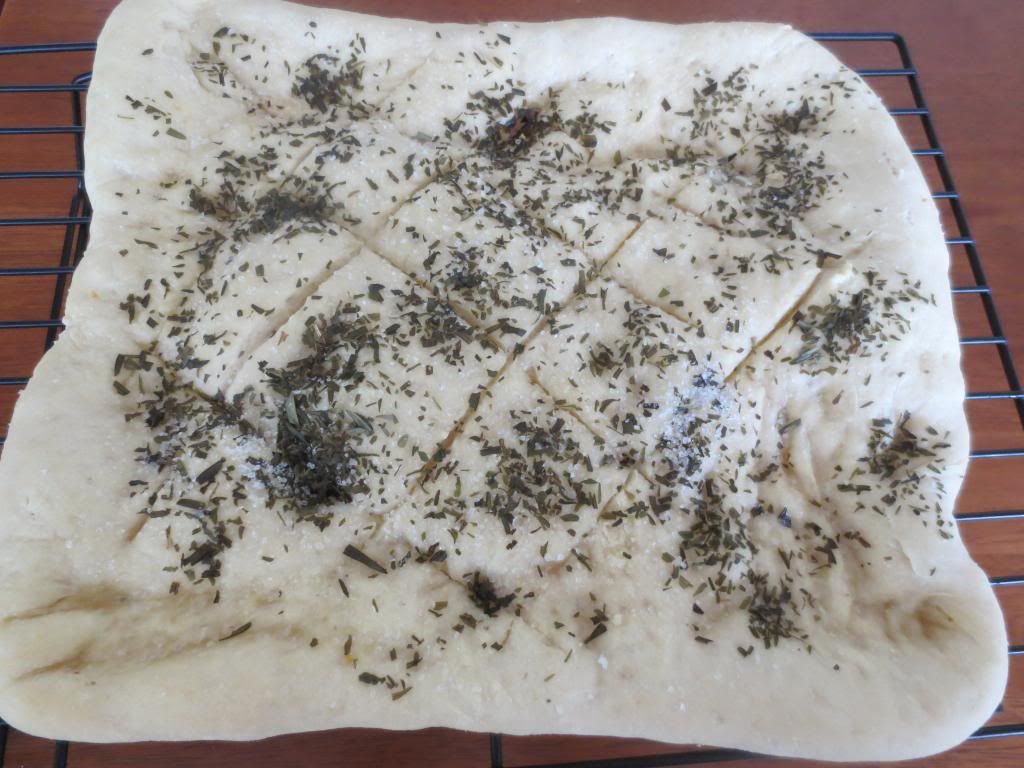
I made only a third of the recipe because I didn't want all of that bread just lying around. I sprinkled my foccacia with dried tarragon, as fresh herbs are expensive, and Persian blue salt that I bought out of curiosity at Gewurzhaus. In the end, it didn't taste any different to ordinary salt.
The author kept talking about the bubbles in the dough, and there certainly were lots of those, although the dough didn't rise much in the oven:
On day 1, the foccacia was delicious - crisp and chewy and flavoursome. However, the foccacia didn't last well, and tasted stale the next day, which was a little disappointing.
To see what the other bakers thpught of this recipe, visit the LYL section of the Baking With Julia website.
It's Friday again, and for French Friday with Dorie this week, our recipe is brown sugar squash and Brussels sprouts en papillote (ie veges in a bag).
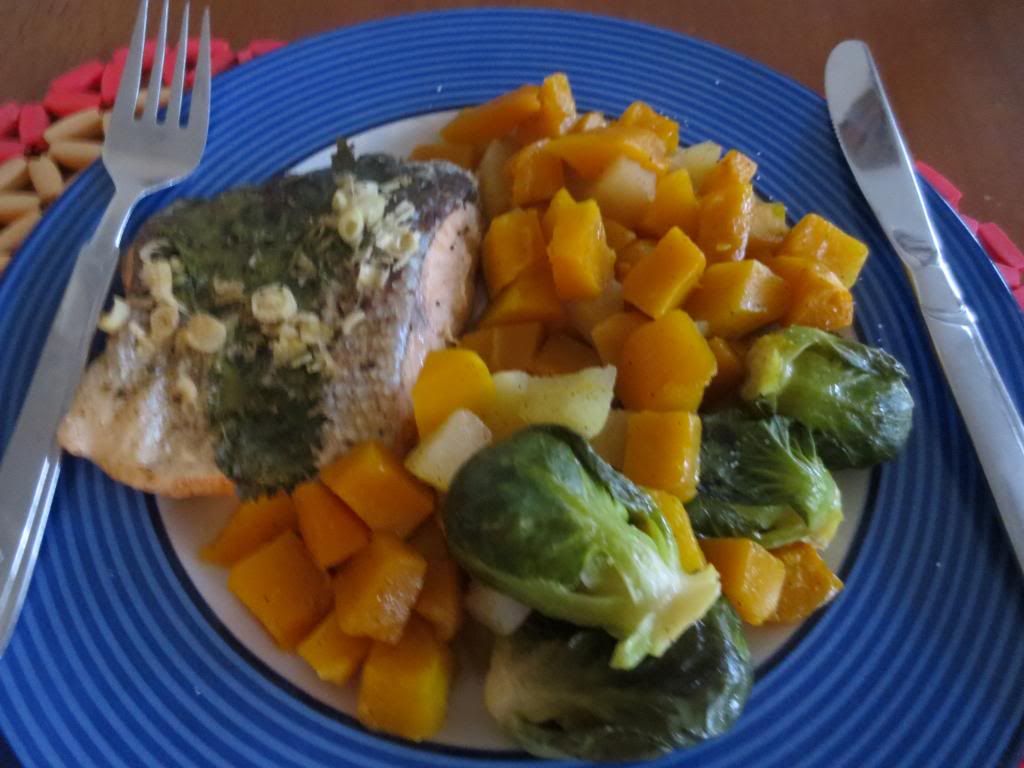
The recipe is to chop up butternut pumpkin (I used Kent pumpkin as there were no butternuts at the supermarket) and apple, toss with Brussels sprouts, olive oil, salt and pepper, sprinkle with brown sugar, then steam in a foil bag in the oven for 25 minutes or so.
I wasn't really sure about this, but then I tasted it - and like wow - I really enjoyed this. The brown sugar and apple gave the vegetables a pleasant sweetness. I served my brown sugar squash and Brussels sprouts en papillote with salmon baked in the bag with coriander, lemon juice, lemongrass, salt and pepper.
This was a delicious dinner, and quick and easy to make.
To see what the other Dorie cooks thought of brown sugar squash and Brussels sprouts en papillote, visit the LYL section of the website.