Sunday, May 31, 2009

Warm and comforting - Beef Massaman Curry and Shepherd's Pie


Are you supersticious? The higher part of me would like to say that I am not, but when I noticed that I would have 13 posts for May if I stopped now, I knew that something had to be done about it, as if 13 posts for a month was akin to walking under a ladder or crossing paths with a black cat. (That said, a friend of mine, Stevie, has the loveliest, enormous, fluffy black cat called Russell, whom I have had the pleasure of cat-sitting on one occasion, and who loves nothing better than a brush. Hmmm, maybe I am not supersticious after all.)

To avoid the 13-post curse, for post number 14, I am going to regale you with some of my savoury ventures. I know, I know, these are not as aesthetically appealing or half as much fun as the cakes, but on the bright side, they will help you to get you "5 a day" and grow up to be big and strong like me (ignore my twig arms, OK?).

The picture at the top of this post is of Bill Granger's Beef Massaman Curry from his latest book, Feed Me Now! There is no picture of it in the book, so now you know what the dish would look like, sans food styling. It is from the chapter called "Freeze Me", so the curry is appropriately photographed in the Tupperware dish in which I intended to freeze it.

Coming from a book with a title like "Feed Me Now!", I assumed that this curry would be quick and easy to make, and left it until 6.30pm to commence. Wrong!!!! It takes the best part of two hours cooking time, leaving aside the preparation matters, so needless to say, I ate baked beans on toast the night that I made this and froze the lot for another night.

Whinging about the time involved aside, this curry is delicious. It is not particularly spicy and it is certainly not "hot", so if these descriptions of a curry float your boat, then this is not the curry for you. Presumably Bill has made it mild because his books are family orientated, and he is trying to share family recipes. This suits me - I don't particularly like things being so hot that my nose and eyes run relentlessly. You could of course spice it up to your liking.

To make Bill's beef massaman curry, you will need:

1.2kg trimmed blade steak, diced
2 teaspoons Chinese five-spice powder
60ml oil (I always just spray the pan with oil, so depends on what you like)
2 diced onions
2 tablespoons massaman curry paste (I used curry powder - perhaps this is why mine wasn't too spicy??)
400ml coconut milk (I used light without incident)
300ml beef stock
2 tablespoons lime juice
1 tablespoon fish sauce
1 tablespoon brown sugar
400g potatoes, peeled and diced
1 large carrot, sliced
2 tablespoons chopped roasted peanuts (I left these out)

Toss the beef in the five spice powder to coat, then brown in batches in a wok in which 2/3 of the oil has been heated. Remove the meat from the wok and set aside.

Add the rest of the oil to the wok and turn down the heat to medium. Cook the onions until soft, then stir in the curry paste until the mixture is fragrant. Add the coconut milk, stock, lime juice, fish sauce and brown sugar to the wok, and bring the mixture to the boil. Add the browned beef to the pan, reduce the heat to low and simmer for 30 minutes.

Add the potatoes, carrots and peanuts (if using), and simmer the curry for another 30-40 minutes until the vegetables and meat are tender.

You can now either cool and freeze the curry, or serve immediately with rice, Thai basil and more peanuts.


My second savoury creation for your delectation is a good old fashioned shepherds pie. Shepherds pie was a staple at home when I was growing up, and there are endless variations of the recipe, but the crucial element is that the pie must be topped with mashed potato (or other root vegetable).

My shepherds pie recipe this time came from here, which proclaims shepherds pie to have originated somewhere in the British Isles.

I made the pie in a dish that was a teensy bit small to take it all, so you can see that it overflowed somewhat:


Doesn't all that tomato sauce look good??

If I made this again, I would add some spice to the potato toppping, which was a tad bland for my liking, and perhaps spiced up the meat with some chilli as well to make the dish a winter zinger. However, once again, if you are feeding the family, the kids are most likely going to eat this if you make it as the recipe states - my memories of being a child tell me that kids do not appreciate "zing".

Many of you are heading into summer (I am "Down Under" so it is the first of winter tomorrow), and these dishes are not very summery, but when the weather gets cooler, I can recommend them as enjoyable and filling meals that can easily be modified to suit your family's (or individual) tastes. For singletons like me, they can also be frozen and reheated as required.

Saturday, May 30, 2009

Sticky ginger and pear cake


I enjoy making cakes just because I want to make them. It doesn't have to be a special occasion, there doesn't have to be anyone coming over for tea - I just like baking cakes. When I see a recipe for a cake with flavours or an appearance that takes my fancy, I just make it - it gives me great pleasure, and it would often be a long wait between cakes if I had to wait for some reason to make them.

When I spied a recipe for Sticky Ginger and Pear Cake by Karen Martini in Sunday Life magazine a couple of weeks ago, I knew I had to make it. The ginger and pear flavours appealed to me, and the glossy photo which accompanied the recipe drew me in immediately.

Unfortunately, I was not particularly careful when checking on the ingredients that I needed. Sure, I dutifully bought some sour cream, pears and glace ginger. However, I overlooked the fact that I didn't have enough brown sugar or any fresh ginger, semolina or golden syrup until the time came for me to make the cake. I also failed to notice that my loaf tin was 10cm shorter than the required size. Oops! As it was late on a school night when I made this, there was no way that I was going to venture to the shops, so I just improvised and hoped for the best.

Thankfully, my improvisations did not stop me from ending up with a gorgeous, glowing, tasty cake. The cake has a delicious, gooey brown sugar and butter top in which the pear and glace ginger are embedded, and beneath, the cake is a dense, tasty gingerbread-style cake. Because my loaf tin was not big enough to take the entirety of the batter, I used the remainder to make 8 mini loaves with topping, which were also delicious.


If you are as smitten with the apperance and sound of this cake as I was, you will need the following to make it (with my adaptations):


Topping

80g butter
110g brown sugar
1/2 teaspoon salt
125g sliced glace ginger
2 peeled and diced pears (I used William pears)


Cake

220g treacle
170g sour cream
2 eggs
280g melted butter
grated zest of 1/2 a lemon
90g plain flour
170g self raising flour
2 teaspoons ground ginger
1/2 teaspoon salt
1 teaspoon baking powder

Preheat your oven to 180 degrees Celsius, and grease a 30cm x 12cm loaf tin and line with baking paper.


For the topping, melt the butter over the stovetop or in the microwave, then combine it in a small saucepan with the bwon sugar and salt. Stir over a low to medium heat until all of the components are combined to form a thick syrup. Pour the sugar mixture into the loaf tin, and arrange the pears and ginger over it.

For the cake, in a large bowl, whisk together the golden syrup, sour cream, brown sugar and eggs. Whisk in the melted butter, then stir through the lemon zest.

Sift the dry ingredients together in a medium bowl, then fold through the wet ingredients. Pour the cake batter over the pear and ginger mixture in the loaf tin, and tap the tin to remove air bubbles.

Bake the cake in the preheated oven for about 50 minutes or until baked through. (My cake in a 20cm x 12cm loaf tin only took 35 minutes.) I recommend placing a baking tray underneath it to catch any syrup that bubbles up from beneath the cake while it it baking.

Remove the baked cake from the oven, and allow it to cool in the tin on a wire rack. When you are ready to serve it, invert the cake onto a cake plate, with the pear and ginger topping uppermost. Enjoy!

Thursday, May 28, 2009

Kiwi Crisps


Regular readers of this blog will know that I am a a Kiwi-phile (probably to the horror of some Kiwis, given that I am a "skippy" - there's always been some rivalry between Australia and New Zealand). I love the Finn brothers, Anika Moa, Flight of the Conchords, Rhys Darby, Dish and Cuisine magazines, ginger crunch, the gorgeous and varied countryside which is ever so much greener than ours, the Kiwi accent, their quirky sense of humour, their fabulous fresh produce (think lamb, fish, wine and venison) - the list goes on. My new work buddy, Ruth, is a Kiwi too.

Last week, Ruth asked me to make some biscuits for her for morning tea - if you don't ask, you don't get, right? It wasn't really the Kiwi connection that led me to do it, but I turned to Ladies, A Plate for a biscuit recipe, a book which is written by New Zealand author Alexa Johnston. I will confess that my choice of biscuit was influenced by (a) simplicity - I wasn't in the mood to fuss; and (b) what I had in the cupboard. With these factors in mind, I landed on a recipe for Kiwi Crisps (a variation of Highlander biscuits containing chocolate chips), which the rest of the world would just call chocolate chip cookies. Kiwi "chocolate chippies" (as they are often called) contain condensed milk, which I knew from reading several other blogs. This makes them a little different to other chocolate chip cookie recipes, although I am not sure what the condensed milk adds to the flavour (or was it just very good marketing by the New Zealand Highlander Milk company that made condensed milk?). Regardless, these cookies are good - you must try them. They are shortbread-like biscuits, which are neither soft and chewy or crispy, but somewhere in between.


The recipe is as follows:

115g butter
55g sugar
2 tablespoons condensed milk
1/2 teaspoon vanilla extract
170g flour
1 teaspoon baking powder
55g dark chocolate chunks

Preheat your oven to 180 degrees Celsius and line two cookie sheets with baking paper or a Silpat mat.

Beat the butter and sugar together using a stand mixer or hand-held electric mixer until pale and smooth, then beat in the condensed milk and vanilla extract.

Sift the dry ingredients together, then work them into the butter mixture until you have a crumbly dough. Tip the dough onto a workbench, add the chocolate chunks, and knead the mixture into a ball.

Break off teaspoonfuls of dough and roll into a ball, and place the balls in rows on the cookie sheets, leaving room for the biscuits to spread slightly. Dip a fork into water and use it to flatten each ball.

Bake the biscuits for 12-15 minutes in the preheated oven, turning the trays after 7 minutes.

Remove the baked cookies form the oven and cool them on a wire rack. Store in an airtight container.

Alexa says you should get about 30 small biscuits; I only got 24, and mine were pretty dainty already.

Enjoy these with a cup of coffee for morning tea and share them with your friends like Ruth did. What could be better?

Wednesday, May 27, 2009

Daring Bakers - May - Apple Streudel


Ah Austria! Scenic land of German speakers, Salzburg (I am a Sound of Music fan!) and home of Mozart. It is also the heartland of some wonderful desserts - thinks Sacher torte and streudel for instance. And it is to the streudels of Vienna that we journey with the Daring Bakers this month.

The May Daring Bakers’ challenge was hosted by Linda of
make life sweeter! and Courtney of Coco Cooks. They chose Apple Strudel from the recipe book Kaffeehaus: Exquisite Desserts from the Classic Cafés of Vienna, Budapest and Prague by Rick Rodgers.

The challenge was to make your own streudel dough and fill it with whatever takes your fancy. I have made streudel dough before in a
pastry class, but this was my first time flying solo.

There have been some wonderfully creative Daring Bakers who created an array of savoury and sweet fillings, but I played it simple and used the apple filling for which our hosts gave us the recipe. (My initial choice was cherry cheese, but I am kind of over rich things at the moment, and the simplicity of the apple filling struck my fancy.)

Here is my rested dough before stretching:


and this is the stretched dough with the holy bits cut off the edges (no, not sacred, just full of holes):


Here is the wonderful apple filling pre-baking (containing apple slices, raisins, rum and almonds) lying on the bread-crumb strewn dough:


After some careful rolling (using the floured tablecloth as an aid) and shaping, I ended up with this horse-shoe shaped streudel pre-baking (with the scariest moment being lifting the delicate but heavy streudel from the table onto the baking tray):


and finally, here is the finished product in all its golden brown, crispy glory:


The streudel baked out quite a lot of juices from the filling, which accounts for all the syrup you can see surrounding the streudel. My dough is orange in colour because I used a red palm-canola oil blend. I also chose to sprinkle the top of the streudel with extra sugar pre-baking to give it a nice crunchy top.

In my opinion, this streudel tasted best straight out of the oven, sliced and served with vanilla icecream. It smelt wonderful and tasted heavenly. The simplicity of the apple filling really won me over, and I would make the filling again for pies and tarts (as well as streudels!). It is not perhaps the handsomest of desserts, but it is very tasty.

Thank you to Linda and Courtney for being our hosts this month. You will be able to find the recipe for the streudel dough and the apple filling at their sites. To check out all the other amazing streudels from my fellow Daring Bakers, visit the
Daring Bakers blogroll.

Tuesday, May 26, 2009

TWD - Chipster-Topped Brownies & 2nd Blogoversary


Are you a chocoholic? Well, you're in for a treat with this week's Tuesday with Dorie, hosted by Beth of Supplicious. She has chosen Dorie's Chipster-Topped brownies, containing a whopping 350g of chocolate. What's a chipster-topped brownie? Well, I am glad you asked. It is an ooey-gooey fudgy chocolate brownie with a topping of chocolate chip cookie dough. Uh huh, you read that right. If you love chocolate, these would be your "crack" brownies.

Making these didn't really give me any headaches. Once again, I was a little worried at how full the baking pan was, and at how thick the cookie dough ended up - I had visions of it sinking into the rather runny brownie batter, and I dobbed it on top so that I didn't have to try and spread it out. Ultimately, the cookie dough did overflow a little over the sides of the tin, but I just cut off the overflow - and the scraps were delicious.

The recipe called for dark and bittersweet chocolate, but I used 100% dark. I also left out the walnuts because I didn't have any, and I figured with all that chocolate and butter, my butt could live without nuts as well.

Although I felt majorly guilty about eating these, they were delicious. If you want to check out some more of these brownies, go to the
Tuesdays with Dorie blogroll, or for the recipe, go to Beth's site.

I have also just realised that it is the second birthday of Laws of the Kitchen today. I will post a blogoversary recipe soon.

Thursday, May 21, 2009

Emily's Blueberry Buckle Cake with Lemon Cream Cheese Glaze


Emily of Visions of Sugar Plum is extremely talented. She writes and makes her own recipes, and her talent has been recognised, among other things, through a couple of television appearances on US TV bake-off contests and by her appointment as a pie judge. Emily has written about her experiences on her blog if you would like to read about them.

I have bookmarked lots of Emily's recipes, but have never previously gotten around to making them. However, I fell in love with her blueberry buckle cake with lemon cream cheese glaze - not only did the flavours (blueberry, lemon, almond, cream cheese, brown sugar) appeal to me, but it looked like such a pretty cake. I knew I had to make this cake.

Here is one of the vanilla blueberry, almond-streusel-topped layers:

and this is a peep inside the cake itself. Look at those berries (and I only used about half of what the recipe required):


My work colleague Ruth says that this is her favourite cake yet. And the cake disappeared very quickly, leaving Gordon disappointed because he missed out :(
Big thanks to Em for sharing her amazing creativity with us! If you too are besotted by the look of this cake, you can find the recipe here.

Wednesday, May 20, 2009

Lime Sorbet for Dinner and a Movie - Shirley Valentine


I've fallen in love with the idea of living.
Shirley Valentine (Pauline Collins) in Shirley Valentine

It's May Dinner and a Movie time (created by Marc of No Recipes and Susan of Stickey Gooey Creamy Chewy), and our host this month is Susan. She has selected Shirley Valentine as the movie from which to seek inspiration this month. I had never previously seen this movie, which was released when I was still in high school. Although it is a relative oldie, this movie is a goodie, and demonstrates some universal truths that are never likely to change.


In brief, the main protagonist in Shirley Valentine is the story of a 42 year old housewife and mother of two grown children called, you guessed it, Shirley Valentine. Shirley is rather bored with her life as it has become, and she wonders wistfully what happened to the daring, rebellious girl of her youth. Shirley's fairy godmother arrives in the guise of her friend Jane, who invites Shirley along on a trip for two to Greece that she won in a radio competition. Although she is initially reluctant to go because she feels that she can't get away/her husband wouldn't approve etc, Shirley's mind is made up when her husband, Joe, behaves disgracefully one evening when she makes chips and egg for tea on a Thursday instead instead of the steak he was expecting.

On the island of Mykonos, Shirley rediscovers herself outside of her role of wife and mother, much to the disapproval of Jane and the other British tourists staying there. A brief holiday fling with a handsome Greek man is part of this journey, but is certainly not the beginning or the end of Shirley's transformation. Shirley rediscovers her joie de vivre, and the closing scenes lead me to hope that she will be able to transfer some of her new outlook on life to her husband.

Despite having a very different life to Shirley, I can certainly relate to her dilemmas; however, having recently read Thirty Something and Over It by Kasey Edwards, I know that neither Shirley nor I are alone in our quest to rediscover the spark in our lives.

As Shirley's adventures centre on her experiences in the Greek Islands, I am naturally inspired to make a Greek-style recipe for this event. During the film, Shirley Valentine rediscovers her zest for life. Together, these elements led me to make a Lime and Yoghurt Sorbet from
The Press Club - Modern Greek Cookery by George Calombaris, an executive director of and head chef at The Press Club restaurant in Melbourne. Why? It's a Greek-style recipe and its zesty, uplifting flavour mirrors Shirley's new-found zest for life.

Sorbets have traditionally been palate cleansers, and this one is no exception. The lime juice gives a mouth-puckering edge to the sorbet which is wonderfully refreshing. I think this quality would make this sorbet the perfect palate cleanser or dessert with a rich Greek dish such as moussaka, as it would cut through that richness and leave your mouth feeling Colgate-clean.


To make The Press Club's Lime and Yoghurt Sorbet, you will need:


2/3 cup skimmed milk
40g white sugar
Juice of 2 limes

Zest of 1 lime
25g liquid glucose
250g Greek yoghurt


Heat the milk, sugar, glucose syrup and lime zest in a saucepan over medium heat until it reaches a gentle simmer, then remove from the heat and cover the top of the pan with clingwrap. Leave the mixture to cool to room temperature.

Once the syrup mixture has cooled, whisk in the yoghurt and lime juice, then pour the mixture into an icecream maker and churn in accordance with the manufacturer's instructions. Place the mixture in a container to freeze.

Remove the sorbet from the freezer before serving and allow it to thaw for around 15 minutes on the bench so that it becomes soft enough to scoop.

If you are keen to escape to a sunny Greek Island, even if just for a few minutes, do go and check out the roundup of terrific Shirley Valentine inspired recipes at Sticky Gooey Creamy Chewy.

Tuesday, May 19, 2009

TWD - Fresh Mango Bread


It's Tuesday with Dorie, and this week, our host Kelly of Baking with the Boys is taking us on a tropical detour with Dorie's recipe for Fresh Mango Bread.

I am not sure whether the "fresh" in the recipe title refers to the fact that you are supposed to use fresh mangoes, or that the bread itself (really a cake or quickbread) is freshly made. If the former, then I unfortunately cannot oblige, as it is many months past mango season in the southern hemisphere. I relied on good old fashioned tinned mangoes, which may have been a good thing, because I didn't get any "hairy" mouth feel that some TWDers got with their fresh mangoes.

My cake is very orange, not because of the mangoes, because I used carotino oil (a mixture of red palm and canola oil).

I was worried about this cake, because the tin ended up being very full (despite my using the recommended size of tin), and it looked suspiciously like it was going to overflow, volcano like, over the sides of the tin during baking. Also, the batter itself was rather odd and thick - at least Dorie warned us about this. However, the end result surpassed my expectations - this cake won't win any beauty contests, but it tastes moist and spicy and delicious. Sure, my raisins sunk to the bottom - but who cares?

It also gave me a little kick to hear the people at work commenting about how much they liked it, not knowing that I had made it and that I was listening with interest to their critique. This made it kinda special for me.

To see how everyone else at TWD went with this "bread", you can check out the
TWD blogroll, and for the recipe, go to Kelly's site.

Sunday, May 17, 2009

The rustic charm of Bill's Apple Fruit Cake


Bill Granger, the gorgeous guy of Australia's celebrity chef circuit (OK, he shares that title with Curtis Stone), has released a new cookbook evocatively entitled Feed Me Now! Bill says that this new book is designed to put forward quick meal ideas to help people (including himself!) to juggle their family-work balance. He urges readers to make mealtimes with family and friends a priority, and an experience that can be enjoyed. I love the sentiment, but it is not helpful to me when I live in a household of one with busy friends leading busy lives with their own families. However, one thing that I can take from Bill's philosophies is that food should be for pleasure, not just sustenance. Perhaps this is the greatest thing that I have learned since first taking an active interest in cooking, which I will attribute to the sparky young Jamie Oliver, whose early "fun and friends" cooking shows inspired me to want to live that dream myself.

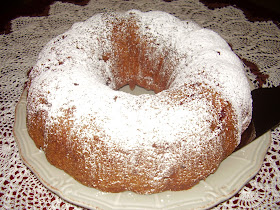
Funnily enough, the first thing that I have made out of Feed Me Now! is not a meal at all, but rather, Bill's recipe for an apple fruit cake (p67). There is no picture of the finished recipe in the book, so I was kind of intrigued by what the finished product would look like. I also had all of the ingredients on hand (or thought I did until I found out that weevils had hitchhiked from Melbourne in my walnuts), which made me decide to give this cake a burl.

The result was a rather pleasing looking cake with a rustic "tea at Gran's" appeal, which is satisfyingly filling to eat. However, I initially found it the teensiest bit on the dry side - perhaps this was because my apples were on the small side, so there was not as much fruit as Bill originally intended to moisten the cake, or it may have been my choice of apple variety (Royal Gala, being a cross between Delicious and Cox's Orange Pippin). However, the next day, this cake had really come into its own, and was moist and flavoursome, with a lovely brown sugar crackly crust. Accordingly, that's my tip for this cake - leave it for a day to allow the flavours and moistness to develop before cutting it.

To make this cake, you will need:

75g raising
3 tablespoons warm tea
3 apples, peeled, cored and diced
250g plain flour
2 teaspoons baking powder
1 teaspoon ground allspice
1 teaspoon ground cinnamon
1 teaspoon grated nutmeg
1/4 teasppoon ground cloves
1/2 teaspoon salt
180g brown sugar
60g white sugar
250g softened butter (shock horror, I used margarine to cut down on saturated fat)
3 medium eggs
1 teaspoon vanilla
85g chopped nuts (Bill used walnuts, I used macadamias due to the unfortunate demise of my walnuts)
2 teaspoons grated ginger (I used one teaspoon of ground ginger instead)

Preheat your oven to 180 degrees Celsius. Leave the raisins to soak in the tea while you make the rest of the cake.

Grease and flour a 25cm bundt pan.

Sift the flour, baking powder, spices and salt together into a stand mixer bowl, and add the sugars, eggs, butter and vanilla. Using the paddle attachment of your mixer, beat the mixture, starting on low speed until the ingredients are just combined then increasing the speed, until the batter is light and smooth.

Drain the raisins. Remove the bowl from the stand mixer, and using a rubber spatula, stir the apples, nuts, fresh ginger (if using) and raisins into the mixture. Place the batter into the prepared bundt tin and smooth the top.

Place the cake in the preheated oven to bake for approximately one hour or until cooked through. Bill recommends using a foil tent over the top of the cake if it browns too quickly.

Remove the baked cake from the oven, and leave it to cool in the tin for 10 minutes before unmoulding it onto a wire rack to cool completely.

Just before serving, sprinkle the top of the cake with sifted icing sugar. Enjoy!

Tuesday, May 12, 2009

TWD - Tartest Lemon Tart


Who doesn't like a lovely lemon tart? It's light and sunny and attractive with a smooth mouth feel and just enough tartness to make your lips pucker slightly. And so were the qualities of this week's Tuesday with Dorie's Tartest Lemon Tart, chosen by Babette of Babette Feasts.

After so much chocolate last month, I was delighted with this choice. The tart uses one and a half whole lemons; however, I was not afraid of this, as I had already made the whole lemon tart posted on Smitten Kitten back in January. I just used whatever common garden variety lemons were available in Woolworths - Meyer lemons are mostly unheard of here. The only parts of the lemon skin that I discarded were the top and the tail, as those pieces are rather knubbly and thick.

Dorie instructed us to use a blender to make the filling instead of a food processor - but next time, I think I'll stick to the food processor, which gives a smoother end result:


Tha tart shell was a nutty version of Dorie's pate sable, which is much beloved by me, as you press it into the pan rather than rolling it out:


I had a few anxious moments when I realised that the tray on which I had put my filled tart to bake was too big for my oven, and the transfer of the loose-bottomed pie pan to another tray was not smooth. There was some spillage, and I feared that I would lose the lot.


However, as you can see, it all turned out well. If I have to be picky, the sides of my tart shell ended up a little over-browned, but still very edible.
I loved this tart - I had two slices of it. It also proved to be popular at work, as it was all gone by lunchtime.

If you would like to see how the other TWD bakers went with this tart, you can visit the
TWD blogroll.

Saturday, May 9, 2009

Inimitable Italian - Orange & Hazelnut Torta


I have just finished reading Five Quarters of the Orange by Joanne Harris. You have to read most of the book before you understand the significance of the title, but it is worth it. Although not as famous as Chocolat, and certainly a darker novel, I actually found this story more interesting and compelling, because there are many mysteries that only unravel slowly as the narrative goes on. If, like me, you are an impatient reader, this technique drives you forward, hungry to read the next instalment.

The story is told partly in the present and partly by flashbacks through the eyes of Framboise, an elderly widow with a secret past. Framboise's mother used to suffer from crippling migraines which were preceded by olfactory hallucinations of oranges. For this reason, oranges take on great significance in the story as the young Framboise learns that she can put her mother "down for the count" by furtively placing orange skins under the stove, so that the orange oils warmed and permeated the house, and in turn, tricked Framboise's mother into believing she was about to have another migraine.

Personally, I am not a huge fan of oranges in their natural state, as they are often difficult to peel and messy to eat. However, oranges in baking is a different matter, and there is nothing like orange (or other citrus) zest or juice to add a little sunshine and punch to baked goods.

The May 2009 edition of Delicious magazine is labelled "The Ultimate Italian edition", and is filled with Italian recipes from many different food writers, including Maggie Beer and Jamie Oliver. Gracing the front cover is the most amazing looking cake, and I knew that I had to make it as soon as I saw it. The cake is Valli Little's Orange & Hazelnut Torta. It is unusual in that it contains a whole orange, skin and all.

Valli dressed her cake with sugared rosemary and orange syrup and marscapone cream, but as mine was always destined to go to work, these accompaniments were not very practical. Accordingly, I converted the syrup into a glaze, and left off the rosemary and cream.

This cake is absolutely delicious! It is very moist because of the orange and carrots and butter it contains, and the citrus/toasted nuts combination was irresistable to me. It also seemed to be appreciated by the wider population, as the whole cake disappeared by just after lunch. (I no longer have a sizeable team to share my baked goods with, so I just placed it in the staff kitchen for everyone to share.)

To make my "no frills" version of this cake, you will need:


1 thin-skinned orange (preferably seedless)
225g chopped butter
280g grated carrot
225g brown sugar
3 eggs
1 1/2 cups hazelnut meal (I made my own)
2 cups self raising four
1/2 cup orange marmalade
2 tablespoons Grand Marnier (I used Cointreau)
50g roughly chopped toasted hazelnuts


Put the orange in a saucepan of simmering water and simmer for 45 minutes with the lid on the pan. Remove the orange from the water and cool.

Preheat your oven to 180 degrees Celsius, an grease and line a 24cm springform pan.

Divide the orange into quarters, remove the remnant of the stem, and remove the seeds (if any), but leave the skin on. Place the orange segments, grated carrot, butter and sugar into a food processor and puree. Add the eggs to the mixture, one at a time, combining each before adding the next. Add the hazelnut meal and pulse the mixture for a few seconds until just combined.

Pour the batter into a large bowl, then fold in the sifted flour using a rubber spatula. Spread the batter into the prepared springform pan, and bake in the preheated oven for 45 minutes or until cooked through. Remove the cake from the oven and cool it in the tin for 10 minutes before demoulding onto a wire rack to finish cooling.

To make the glaze, place the marmalade and orange liqueur into a saucepan, and stir over medium heat until the marmalade has dissolved. Strain the mixture into a bowl to remove the orange peel, then stir the toasted hazelnuts into the strained jam. Pour the glaze over the top of the cake and spread over the top using a pastry brush.

If you like the citrus/nut flavour combination, do make this cake. It is easy, relatively quick (once the orange has been cooked and cooled!) and results in a moist, flavourful cake that is miles removed from the icing and cream-sodden confections that you find in so many bakeshops these days.


In honour of mothers everywhere, including mine and Framboise's (sorry about the oranges!), I am sending this to my friend (and a mother herself) Ivy at Kopiaste for her Celebrating Mother's Day event.


Thursday, May 7, 2009

Salmon spaghetti


Jamie Oliver is one of my favourite TV chefs - I loved his "cheeky chappy" persona back in his younger days, and I have enjoyed watching him become a rounded individual who seems to care for the wider community and does what he can to improve lives through teaching cooking skills.

I own most of his books, including Cook with Jamie, which I would probably rate as my favourite. There are terrific categories of recipes which allow you to choose pasta, meat, fish, vegetables and desserts. I particularly like Jools Favourite Sunday Afternoon Pasta and his roasted chicken breast variations (especially with the lemon Bombay potatoes!).

However, not everything that I have made from this book has taken my fancy. For example, I found that the Fifteen Chocolate Brownies didn't really set properly (perhaps they were supposed to be gooey? For the record, my work colleagues loved them).

In the latter category is Jamie's Lovely Crab Linguine, which in my hands, became Salmon Spaghetti. Crabmeat is hideously expensive at present, tinned or fresh, and I couldn't justify the cost when the object was to save money on work lunches by bringing lunch from home.

I am not sure whether the flavour of the salmon, which is stronger than crabmeat, simply overpowered the other flavours (fennel, chilli, lemon), or whether this just wasn't my thing, but this didn't grab me at all. I also left out the fennel seeds and most of the 140ml of oil (which would have made the pasta soooooo much more calorific) - perhaps this had a strong influence. Unfortunately, I just felt that this dish did not have enough "oomph" - I would have much preferred a rich, tomato based pasta. However, to be fair, Jamie says that in its guise as crab linguine with all the ingredients, it is a favourite at his Fifteen restaurants.

To make my lower cal, lower budget version of this dish, you will need:

2 chillis, deseeded and finely chopped
zest and juice of 1 lemon
1 fennel bulb, shaved into pieces with a vegetable peeler
2 tablespoons olive oil
500g dried spaghetti
400g tin of salmon
salt and pepper to taste

Put the chilli, fennel, lemon juice and zest and salmon in a heatproof bowl, season with salt and pepper, and heat over a saucepan of water which is brought to the boil. Carefully test the meat with your finger to feel when it is heated through, then remove from the heat.

Cook the spaghetti according to the packet instructions, and drain, reserving a little of the cooking water. Toss the salmon mixture through the spaghetti, adding extra lemon juice or reserved cooking water to loosen the pasta, if necessary. Decorate the top of the spaghetti with the herby tops off the fennel bulb, and serve immediately.

Unfortunately, I can only describe my attempt at this dish as "meh", even though it looks pretty. If you have tried Jamie's original, I'd love to hear what you thought. However, I can't say that I will make this again - and I have 5 more serves to eat. I can see myself ditching the "cut lunch" for a good old spud with ham and cheese from Toowong ...

Postscript:
I rescued this dish by adding sweet chilli sauce to it - it was much better that way, though I am unlikely to make it again.

Wednesday, May 6, 2009

Beef Noodles with Orange and Ginger


It's been a while since I posted about anything other than baking, so to mix it up a bit, I am going to share with you one of the recent main meals that I made - Beef Noodles with Orange and Ginger.

I really like Asian flavours - they are crisp and clear, and the meals themselves are usually quite light, so you are not left feeling bloated afterwards. I am pretty hopeless at keeping down calories, so I was quite excited when I saw the Low Fat, Low Cholesterol Chinese Cookbook by Maggie Pennell and Jenni Fleetwood for sale at an online bookstore. If someone else helps me out with "healthiness", that is a great start.

Flicking through this book, the recipe for Beef Noodles with Ginger and Orange caught my eye. I have never tried orange flavours with beef before (although I once made marmalade chicken), and I am a fan of citrus and ginger flavours, so I decided that this was the dish for me.

As you can see, this dish looks pretty good with its burnished orange sauce. My only complaint is that I would have liked more vegetables in the recipe than just carrot and spring onion (easily fixed), and I found the portion size quite small (which is probably deliberate given this is a low fat, low cholesterol cookbook). Otherwise, I really enjoyed the unusual pairing of beef and orange, with the ginger zing in the background.

To make this stir-fry style dish (with my modifications), you will need:

450g lean beef, cut into thin strips
zest and juice of 1 orange
1 tablespoon light soy sauce
1 teaspoon cornflour
2.5cm knob of fresh ginger, grated
175g rice noodles
3 teaspoons cooking oil
1 carrot cut into matchsticks
2 spring onions, thinly sliced

Put the beef, orange zest and orange juice into a bowl to marinate for half an hour.

Drain the beef, reserving the juice, and set the juice aside.

In a large bowl, mix the beef with the soy sauce, cornflour and ginger.

Cook the noodles in accordance with the packet instructions and set aside; keep them warm.

Place the oil in a large wok or frypan, and heat it until hot. Add the beef and stir fry for one minute, then add the carrots and stiry fry for another 3 minutes.

Add the spring onions and the reserved juice to the wok, and heat ntil the sauce boils and thickens. Remove the wok from the heat.

Serve the beef immediately over a bed of rice noodles. (Serves 4)

Tuesday, May 5, 2009

TWD - A Little Pick-Me-Up - Tiramisu Cake


This week's Tuesday With Dorie revolves around Dorie's delicious Tiramisu Cake, and was chosen by Megan of My Baking Adventures. I have made the Tiramisu Cake once before (I think it was the first thing that I ever made out of BFMHTY), but was happy to make it again, without any alterations, for a brand new audience. Unfortunately, there is no special occasion involved - other than TWD, of course.


My previous comments about this cake really sum up my thoughts. In making it, I used instant coffee powder instead of expresso powder, and it worked just fine. For the alcohol component, I used brandy. Luckily, marscapone is readily available in the supermarkets here, so I didn't have to make any substitutions (unlike some TWDers, who had the challenge of finding a substitute for marscapone). Although I thought it would be fun to do cupcakes second time around, I really didn't have the time up my sleeve (I left it until Monday night before posting to make it!), although I understand that a few TWDers did try this.


The finished cake looks like a huge cappucino - which is very cool for a coffee flavoured cake.


To see what the other TWDers thought about this cake, check out the TWD blogroll.